
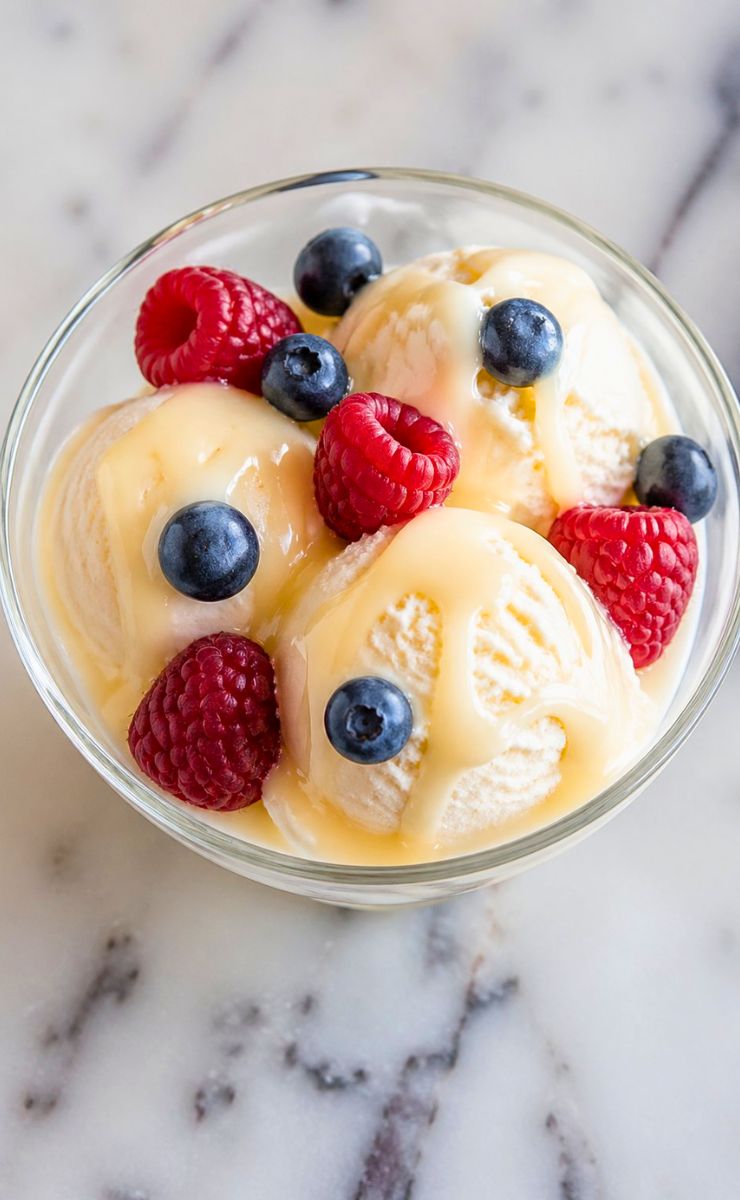
This Mary Berry ice cream with condensed milk recipe is simple, creamy and so easy to make. You do not need an ice cream machine.
Just a few ingredients and a little patience. This Mary Berry ice cream with condensed milk recipe gives you smooth and rich results every time.
If you want to learn how to make Mary Berry ice cream with condensed milk, this guide will help you. The ingredients for Mary Berry ice cream with condensed milk are simple and easy to find.
Why I Love Making This Ice Cream
The first time I made this ice cream, I could not believe how easy it was. No churning. No stress. Just mix and freeze. This recipe is inspired by Mary Berry, known for simple and elegant desserts.
I love how creamy it turns out. The condensed milk adds sweetness and smooth texture. It feels like a treat from an ice cream shop, but made at home.
Equipment List
- Mixing bowl
- Electric mixer or whisk
- Spatula
- Freezer-safe container
- Measuring cups
Recipe Overview
- Recipe Name: Mary Berry Ice Cream with Condensed Milk Recipe
- Servings: 6 servings
- Prep Time: 10 minutes
- Cook Time: 0 minutes
- Total Time: 6 hours (including freezing)
- Course: Dessert
- Cuisine: British
- Calories: 300 kcal per serving
Ingredients You Need for Mary Berry Ice Cream with Condensed Milk
- 2 cups heavy cream
- 1 can (400g) condensed milk
- 1 teaspoon vanilla extract
Optional Add-ins:
- ½ cup chocolate chips
- ½ cup crushed cookies
- Fresh fruits like strawberries or mango
Step-by-Step Guide
1. Chill Your Tools
Place your mixing bowl and whisk in the fridge for 15 minutes. Cold tools help cream whip faster. This step makes the process easier and gives better results.
2. Whip the Cream
Pour heavy cream into the chilled bowl. Beat it using a mixer. Whip until soft peaks form. The cream should look fluffy but not too stiff.
3. Add Condensed Milk
Slowly pour condensed milk into the whipped cream. Fold gently using a spatula. Do not mix too hard. This keeps the mixture light and airy.
4. Add Flavor
Add vanilla extract and mix gently. This gives the ice cream a nice flavor. You can also add other flavors if you like.
5. Add Optional Ingredients
Now add chocolate chips, fruits or cookies. Fold them into the mixture. This step adds texture and fun flavors.
6. Transfer to Container
Pour the mixture into a freezer-safe container. Smooth the top with a spatula. Cover tightly with a lid or plastic wrap.
7. Freeze the Ice Cream
Place the container in the freezer. Let it freeze for at least 6 hours. Overnight is even better for perfect texture.
8. Check the Texture
After freezing, check the ice cream. It should be firm but easy to scoop. If too hard, let it sit at room temperature for a few minutes.
9. Scoop and Serve
Use an ice cream scoop to serve. Place scoops in bowls or cones. Enjoy the creamy and smooth texture.
10. Enjoy Fresh
Serve immediately after scooping. Homemade ice cream tastes best fresh. Share with family and friends for a joyful moment.
Read More: Hawaiian Bros Dole Whip Recipe
Expert Tips & Variations
- Use full-fat cream for best texture
- Do not overwhip the cream
- Add caramel for a rich flavor
- Try cocoa powder for chocolate version
- Use fresh fruits for natural sweetness
- Store in airtight container to avoid ice crystals
History or Fun Fact About the Dish
No-churn ice cream became popular because it is simple. It does not need special machines.
Bakers like Mary Berry made such recipes famous. She focuses on easy desserts with great taste. This method saves time and effort while still giving amazing results.
Pairings & Complementary Recipes
This ice cream goes well with many desserts. Serve it with warm brownies. The mix of hot and cold tastes amazing. You can also pair it with fruit pies or cakes. Even simple cookies taste better with a scoop of this ice cream.
Occasion or Event Ideas
This recipe is perfect for summer days. It is also great for family gatherings. You can serve it at birthdays or small parties. Kids and adults both love it. It is easy to make in advance.
Storage and Reheating Tips
- Store in freezer-safe container
- Keep for up to 2 weeks
- Cover tightly to avoid ice crystals
- Let sit 5 minutes before scooping
- Do not refreeze melted ice cream
Nutrition Information
| Nutrient | Amount per Serving |
|---|---|
| Calories | 300 kcal |
| Carbohydrates | 28 g |
| Protein | 5 g |
| Fat | 18 g |
| Sugar | 24 g |
Health Benefits
This ice cream provides energy from sugar and fat. It also contains calcium from cream. While it is a treat, enjoying it in moderation is key. Using fresh ingredients at home helps control quality and flavor.

Mary Berry Ice Cream with Condensed Milk Recipe
Ingredients
- 2 cups heavy cream
- 1 can 400g condensed milk
- 1 teaspoon vanilla extract
Optional Add-ins:
- ½ cup chocolate chips
- ½ cup crushed cookies
- Fresh fruits like strawberries or mango
Instructions
Chill Your Tools
- Place your mixing bowl and whisk in the fridge for 15 minutes. Cold tools help cream whip faster. This step makes the process easier and gives better results.
Whip the Cream
- Pour heavy cream into the chilled bowl. Beat it using a mixer. Whip until soft peaks form. The cream should look fluffy but not too stiff.
Add Condensed Milk
- Slowly pour condensed milk into the whipped cream. Fold gently using a spatula. Do not mix too hard. This keeps the mixture light and airy.
Add Flavor
- Add vanilla extract and mix gently. This gives the ice cream a nice flavor. You can also add other flavors if you like.
Add Optional Ingredients
- Now add chocolate chips, fruits or cookies. Fold them into the mixture. This step adds texture and fun flavors.
Transfer to Container
- Pour the mixture into a freezer-safe container. Smooth the top with a spatula. Cover tightly with a lid or plastic wrap.
Freeze the Ice Cream
- Place the container in the freezer. Let it freeze for at least 6 hours. Overnight is even better for perfect texture.
Check the Texture
- After freezing, check the ice cream. It should be firm but easy to scoop. If too hard, let it sit at room temperature for a few minutes.
Scoop and Serve
- Use an ice cream scoop to serve. Place scoops in bowls or cones. Enjoy the creamy and smooth texture.
Enjoy Fresh
- Serve immediately after scooping. Homemade ice cream tastes best fresh. Share with family and friends for a joyful moment.
FAQs about Mary Berry Ice Cream with Condensed Milk
1. Can I make this without a mixer?
Yes, you can use a hand whisk. It will take more time and effort, but it still works. Make sure to whip until soft peaks form.
2. How long does it take to freeze?
It usually takes about 6 hours. For best results, freeze overnight. This gives a smoother and firmer texture.
3. Can I add different flavors?
Yes, you can add many flavors. Chocolate, fruit or nuts all work well. This recipe is very flexible and easy to customize.
4. Why is my ice cream too hard?
It may be overfrozen. Let it sit at room temperature for a few minutes before scooping. This will soften it.
5. Can I make it dairy-free?
You can try using coconut cream and dairy-free condensed milk. The taste will change, but it still works.
Final Thoughts
This Mary Berry ice cream with condensed milk recipe is simple, creamy and perfect for beginners. It shows how easy dessert can be. Now you know how to make Mary Berry ice cream with condensed milk at home.
With basic ingredients for Mary Berry ice cream with condensed milk, you can create a delicious frozen treat. Try it once and it may become your favorite homemade dessert.

Zoey Lane is the voice behind ZoeyCooks.com, where she shares comforting, home-tested recipes inspired by everyday cooking. She believes great food should be simple, approachable and enjoyable to make.