
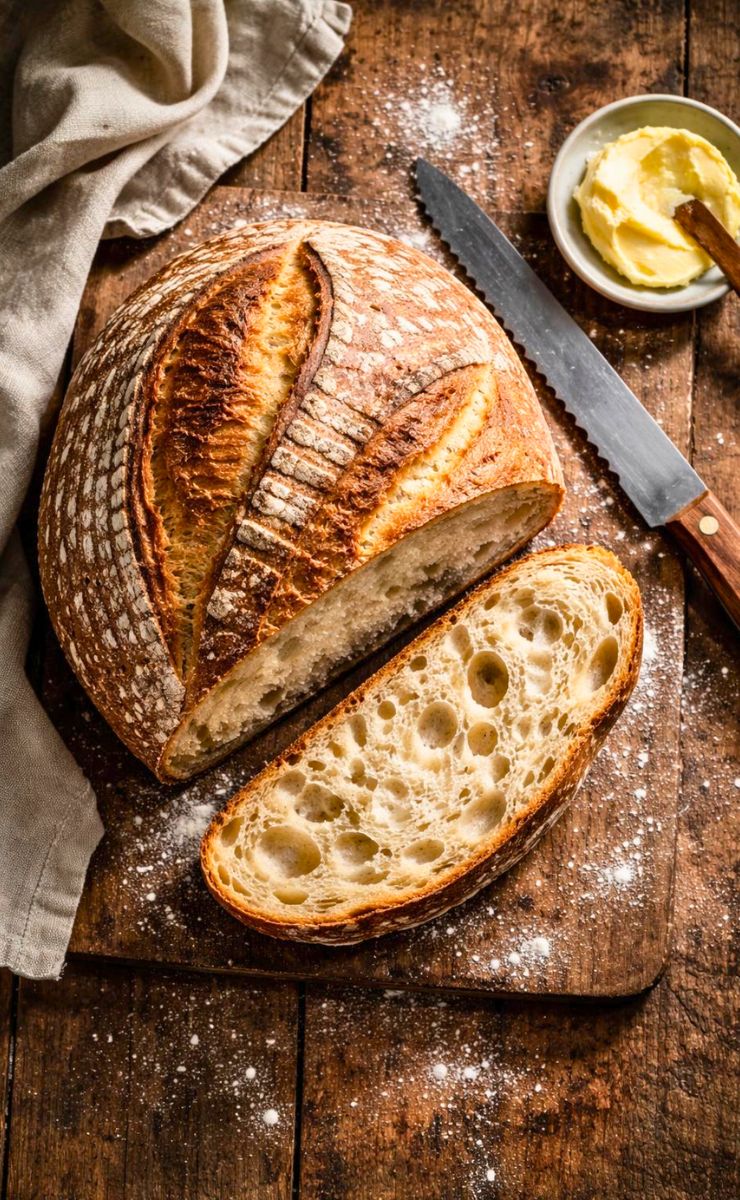
This Paul Hollywood Sourdough Bread Recipe creates a beautiful loaf with a crisp crust and soft chewy center. The flavor is rich, slightly tangy and wonderfully homemade.
I love making this Paul Hollywood Sourdough Bread Recipe because it turns simple ingredients into something special.
Fresh sourdough always makes the kitchen smell amazing. This homemade sourdough bread is perfect for sandwiches, toast or serving alongside soups and family dinners throughout the week.
Why I Love Making This Paul Hollywood Sourdough Bread
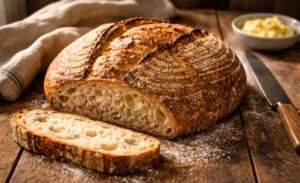
There is something magical about baking sourdough bread. Watching the dough rise slowly feels rewarding and relaxing. The first time I sliced into a homemade loaf, I could not believe the texture.
The crust crackled beautifully while the inside stayed soft and airy. I also enjoy how simple the ingredients are.
Flour, water, salt and sourdough starter create something truly delicious. Every loaf feels like a small accomplishment. Family members always gather around when fresh bread comes out of the oven.
Equipment List
- Large mixing bowl
- Kitchen scale
- Measuring cups
- Dough scraper
- Clean kitchen towel
- Proofing basket or bowl
- Sharp knife or bread lame
- Dutch oven or baking stone
- Cooling rack
Recipe Overview
- Recipe Name: Paul Hollywood Sourdough Bread Recipe
- Servings: 12 slices
- Prep Time: 30 minutes
- Cook Time: 45 minutes
- Total Time: 15 hours
- Course: Bread
- Cuisine: British, European
- Calories: 180 kcal per slice
Ingredients You Need for Paul Hollywood Sourdough Bread
- 500g bread flour
- 350ml warm water
- 100g active sourdough starter
- 10g salt
- Extra flour for dusting
Step-by-Step Guide
1. Prepare the Starter
Make sure your sourdough starter is active and bubbly before beginning. Feed it several hours earlier if needed. A healthy starter helps create good rise, beautiful texture, and the classic sourdough flavor everyone loves.
2. Mix the Dough
Place the bread flour into a large mixing bowl. Add the active sourdough starter and warm water. Stir everything together until no dry flour remains. The dough will look rough and sticky at this stage.
3. Let the Dough Rest
Cover the bowl with a clean towel and let the dough rest for thirty minutes. This resting period allows the flour to absorb moisture fully. The dough becomes easier to handle and develops better structure.
4. Add the Salt
Sprinkle the salt evenly over the dough. Gently mix until the salt is fully incorporated. The dough may feel slippery at first. Continue folding until everything combines into a smooth mixture.
5. Perform the First Stretch and Fold
Lift one side of the dough and fold it toward the center. Rotate the bowl and repeat several times. This process strengthens the dough naturally without heavy kneading while improving texture and rise.
6. Continue Stretch and Folds
Repeat the stretch-and-fold process every thirty minutes for about two hours. Each round builds strength inside the dough. You will notice the dough becoming smoother, more elastic and easier to shape.
7. Let the Dough Rise
Cover the bowl and leave the dough at room temperature for several hours. The dough should increase in size noticeably. Small bubbles will appear throughout, showing that fermentation is working properly.
8. Shape the Dough
Transfer the dough onto a lightly floured surface. Shape it into a round loaf carefully without pressing out all the air. Creating surface tension helps the bread keep its shape during baking.
9. Proof the Dough
Place the shaped dough into a floured proofing basket. Cover it and refrigerate overnight. Slow proofing develops deeper flavor and improves the texture of the finished sourdough bread significantly.
10. Preheat the Oven
The next day, place a Dutch oven inside your oven. Preheat to 450°F (230°C). A hot baking environment helps create the crisp crust and beautiful oven spring sourdough is known for.
11. Score the Dough
Carefully remove the dough from the basket onto parchment paper. Use a sharp blade to score the top. Scoring controls expansion during baking and gives the loaf its classic artisan appearance.
12. Bake the Bread
Place the dough into the hot Dutch oven and cover with the lid. Bake for thirty minutes. Remove the lid and bake another fifteen minutes until the crust becomes deeply golden brown.
13. Cool Before Slicing
Transfer the bread onto a cooling rack immediately after baking. Allow it to cool completely before slicing. This step helps the crumb set properly and prevents a gummy texture inside.
Read More: Japanese Mango Pancake Recipe
Expert Tips & Variations
- Use high-quality bread flour
- Keep your starter active
- Avoid adding too much extra flour
- Refrigerate overnight for better flavor
- Add seeds for extra texture
- Mix in dried herbs for variety
- Use whole wheat flour for part of the dough
- Preheat the Dutch oven thoroughly
- Let bread cool fully before cutting
History or Fun Fact About the Dish
Sourdough bread is one of the oldest forms of bread making. Ancient civilizations used natural fermentation long before commercial yeast existed.
Bakers relied on wild yeast found in flour and air. Today, sourdough remains popular because of its unique flavor, chewy texture and traditional baking process.
Paul Hollywood helped introduce many home bakers to artisan bread making through his baking shows and recipes. His techniques encourage confidence and patience in the kitchen.
Pairings & Complementary Recipes
This sourdough bread pairs beautifully with soups, stews, salads and pasta dishes. It also tastes wonderful with butter, jam, honey or cream cheese.
For breakfast, serve toasted sourdough with scrambled eggs and fresh fruit. For lunch, use it for grilled cheese sandwiches. For dinner, enjoy it alongside roasted chicken or vegetable soup.
Occasion or Event Ideas
Homemade sourdough bread is perfect for family dinners, holiday meals, brunch gatherings and weekend baking projects. It also makes a thoughtful homemade gift.
Fresh bread placed on the table instantly makes any meal feel special. Guests often appreciate the effort and love that goes into baking a loaf from scratch.
Storage and Reheating Tips
- Store at room temperature for 3 days
- Keep wrapped in a bread bag
- Avoid storing in the refrigerator
- Freeze slices for up to 3 months
- Toast frozen slices directly
- Reheat in a warm oven for fresh texture
- Store cut side down on a board
Nutrition Information
| Nutrient | Amount Per Slice |
|---|---|
| Calories | 180 kcal |
| Carbohydrates | 35g |
| Protein | 6g |
| Fat | 1g |
| Fiber | 2g |
| Sugar | 0g |
| Sodium | 190mg |
Health Benefits
Sourdough bread offers several nutritional benefits. The fermentation process may help improve digestibility for some people. It also contains beneficial compounds created during fermentation.
Homemade sourdough allows complete control over ingredients without unnecessary additives. The bread provides carbohydrates for energy and can be part of a balanced diet when enjoyed in moderation alongside nutritious foods.
Paul Hollywood Sourdough Bread Recipe
Ingredients
- 500 g bread flour
- 350 ml warm water
- 100 g active sourdough starter
- 10 g salt
- Extra flour for dusting
Instructions
Prepare the Starter
- Make sure your sourdough starter is active and bubbly before beginning. Feed it several hours earlier if needed. A healthy starter helps create good rise, beautiful texture, and the classic sourdough flavor everyone loves.
Mix the Dough
- Place the bread flour into a large mixing bowl. Add the active sourdough starter and warm water. Stir everything together until no dry flour remains. The dough will look rough and sticky at this stage.
Let the Dough Rest
- Cover the bowl with a clean towel and let the dough rest for thirty minutes. This resting period allows the flour to absorb moisture fully. The dough becomes easier to handle and develops better structure.
Add the Salt
- Sprinkle the salt evenly over the dough. Gently mix until the salt is fully incorporated. The dough may feel slippery at first. Continue folding until everything combines into a smooth mixture.
Perform the First Stretch and Fold
- Lift one side of the dough and fold it toward the center. Rotate the bowl and repeat several times. This process strengthens the dough naturally without heavy kneading while improving texture and rise.
Continue Stretch and Folds
- Repeat the stretch-and-fold process every thirty minutes for about two hours. Each round builds strength inside the dough. You will notice the dough becoming smoother, more elastic, and easier to shape.
Let the Dough Rise
- Cover the bowl and leave the dough at room temperature for several hours. The dough should increase in size noticeably. Small bubbles will appear throughout, showing that fermentation is working properly.
Shape the Dough
- Transfer the dough onto a lightly floured surface. Shape it into a round loaf carefully without pressing out all the air. Creating surface tension helps the bread keep its shape during baking.
Proof the Dough
- Place the shaped dough into a floured proofing basket. Cover it and refrigerate overnight. Slow proofing develops deeper flavor and improves the texture of the finished sourdough bread significantly.
Preheat the Oven
- The next day, place a Dutch oven inside your oven. Preheat to 450°F (230°C). A hot baking environment helps create the crisp crust and beautiful oven spring sourdough is known for.
Score the Dough
- Carefully remove the dough from the basket onto parchment paper. Use a sharp blade to score the top. Scoring controls expansion during baking and gives the loaf its classic artisan appearance.
Bake the Bread
- Place the dough into the hot Dutch oven and cover with the lid. Bake for thirty minutes. Remove the lid and bake another fifteen minutes until the crust becomes deeply golden brown.
Cool Before Slicing
- Transfer the bread onto a cooling rack immediately after baking. Allow it to cool completely before slicing. This step helps the crumb set properly and prevents a gummy texture inside.
Notes
- Use high-quality bread flour
- Keep your starter active
- Avoid adding too much extra flour
- Refrigerate overnight for better flavor
- Add seeds for extra texture
- Mix in dried herbs for variety
- Use whole wheat flour for part of the dough
- Preheat the Dutch oven thoroughly
- Let bread cool fully before cutting
FAQs about Paul Hollywood Sourdough Bread Recipe
1. Why is my sourdough bread not rising properly?
The most common reason is an inactive sourdough starter. Make sure your starter is bubbly and active before mixing the dough. Temperature can also affect fermentation and rising time significantly.
2. Can I make sourdough bread without a Dutch oven?
Yes, you can use a baking stone or baking sheet instead. Place a tray of hot water inside the oven to create steam. This helps produce a crisp crust.
3. How do I know when sourdough bread is fully baked?
The loaf should have a deep golden crust and sound hollow when tapped on the bottom. An internal temperature of about 205°F also indicates proper doneness.
4. Why should I wait before slicing the bread?
Fresh bread continues cooking internally while cooling. Slicing too early can create a gummy texture. Waiting allows the crumb to set and improves the final texture.
5. Can I freeze homemade sourdough bread?
Yes, sourdough freezes very well. Slice the loaf before freezing for convenience. Individual slices can be toasted directly from frozen without thawing first.
Final Thoughts
This Paul Hollywood Sourdough Bread Recipe is a rewarding baking project that delivers incredible flavor and texture.
The crispy crust and soft chewy center make every slice memorable. While sourdough requires patience, the results are worth every minute.
Once you bake your own homemade sourdough loaf, you may never look at store-bought bread the same way again. Fresh, warm and comforting, it truly feels like a special homemade treat.

Zoey Lane is the voice behind ZoeyCooks.com, where she shares comforting, home-tested recipes inspired by everyday cooking. She believes great food should be simple, approachable and enjoyable to make.