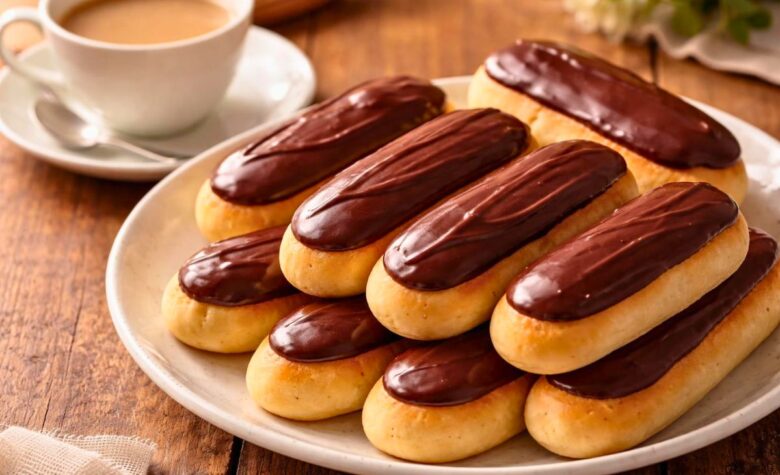
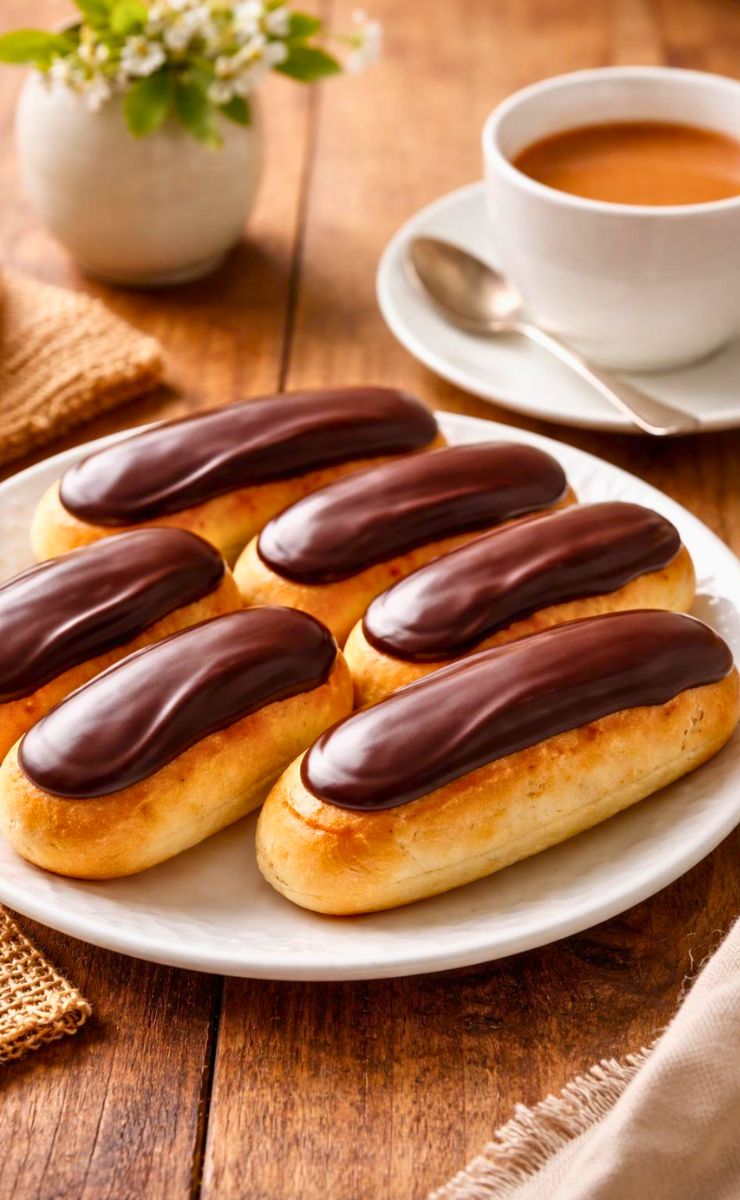
The Mary Berry Iced Fingers Recipe is a classic, sweet biscuit that’s perfect for tea time. Crispy, buttery and topped with smooth chocolate, these treats are loved by families everywhere.
Many people search for how to make Mary Berry Iced Fingers at home. The Ingredients for Mary Berry Iced Fingers are simple and easy to find.
This recipe is ideal for afternoon tea, birthday parties or just a cozy snack with a cup of tea or coffee. It’s fun to bake and even more fun to eat.
Why I Love Making This Mary Berry Iced Fingers
I love making Mary Berry Iced Fingers for special occasions. The smell of baking butter and sugar fills the kitchen. My family always gathers around to watch me ice them.
The biscuits are crisp and light, with a smooth chocolate topping that everyone enjoys. They’re simple to make, but they feel fancy.
I often make extra to give as gifts in little boxes. Seeing the chocolate set perfectly is always satisfying. These biscuits bring back happy childhood memories of teatime treats.
Equipment List
- Mixing bowls
- Electric mixer or hand whisk
- Baking tray
- Parchment paper
- Rolling pin
- Knife or pastry cutter
- Saucepan for chocolate
- Spoon or small spatula for icing
Recipe Overview
- Recipe Name: Mary Berry Iced Fingers Recipe
- Servings: 12–16 biscuits
- Prep Time: 20 minutes
- Cook Time: 15–20 minutes
- Total Time: 40 minutes
- Course: Snack / Tea Time
- Cuisine: British
- Calories: About 180 kcal per biscuit
Ingredients You Need for Mary Berry Iced Fingers
For the Biscuits:
- 225 g unsalted butter, softened
- 100 g caster sugar
- 1 egg, beaten
- 1 teaspoon vanilla extract
- 225 g plain flour
- Pinch of salt
For the Icing:
- 100 g dark chocolate
- 25 g butter
Step-by-Step Guide
1. Preheat the Oven
Preheat oven to 180°C (160°C fan) or 350°F. Line a baking tray with parchment paper. Proper heat ensures even baking.
2. Cream Butter and Sugar
In a bowl, beat butter and sugar until light and fluffy. This makes biscuits soft yet crisp.
3. Add Egg and Vanilla
Add beaten egg and vanilla extract. Mix gently until combined. Do not overmix, or biscuits may be tough.
4. Fold in Flour
Sift flour and salt into the mixture. Fold gently until a smooth dough forms. Dough should be soft but not sticky.
5. Shape the Biscuits
Roll dough on a floured surface to about 1 cm thick. Cut into finger shapes using a knife. Place on prepared tray.
6. Bake the Biscuits
Bake for 15–20 minutes until golden at the edges. Remove from oven and cool on a wire rack. Cool completely before icing.
7. Prepare the Chocolate Icing
Melt dark chocolate and butter together in a saucepan over low heat. Stir until smooth. Remove from heat to cool slightly.
8. Ice the Biscuits
Spread melted chocolate over each biscuit with a spoon or small spatula. Let chocolate set completely. Place in a cool, dry place.
9. Serve and Enjoy
Serve biscuits on a plate with tea or coffee. Store leftovers in an airtight container. Enjoy the crisp biscuit and rich chocolate together.
Read More: Mary Berry Cheese Scones Recipe
Expert Tips & Variations
- Use milk chocolate for a sweeter topping.
- Add a sprinkle of chopped nuts or coconut before chocolate sets.
- Freeze uniced biscuits for up to 1 month. Ice after thawing.
- For extra flavor, add a teaspoon of orange zest to the dough.
- Make mini versions for party platters or gifts.
History or Fun Fact About the Dish
Iced fingers are a classic British biscuit. Mary Berry’s version is famous for perfect crispness and chocolate topping. They became popular in the 20th century as a teatime treat.
The name comes from their shape, like fingers. Mary Berry’s recipe is beloved because it’s simple, reliable and produces consistent results every time.
Pairings & Complementary Recipes
Serve iced fingers with a cup of Earl Grey or English breakfast tea. Pair with scones, jam and clotted cream for a full tea experience.
They also go well with coffee or hot chocolate. Serve alongside shortbread or other Mary Berry biscuits for variety.
Occasion or Event Ideas
Perfect for afternoon tea parties, birthday celebrations, or festive gatherings. Great for homemade gifts during holidays.
Ideal for school events or cozy family tea at home. These biscuits make any occasion special with minimal effort.
Storage and Reheating Tips
- Store iced fingers in an airtight container at room temperature.
- Keeps fresh for up to 5 days.
- Do not refrigerate, or chocolate may bloom.
- Freeze uniced biscuits for up to 1 month. Ice after thawing.
- Ensure chocolate has fully set before storing.
Nutrition Information
| Nutrient | Amount Per Biscuit |
|---|---|
| Calories | 180 kcal |
| Protein | 2 g |
| Fat | 10 g |
| Carbohydrates | 20 g |
| Sugar | 12 g |
| Fiber | 1 g |
Health Benefits
These biscuits provide energy from carbohydrates. Butter gives fat for satiety and flavor. Dark chocolate contains antioxidants and small amounts of minerals.
While a treat, they are perfect for enjoying in moderation. Baking at home allows control over ingredients compared to store-bought biscuits.

Mary Berry Iced Fingers Recipe
Ingredients
For the Biscuits:
- 225 g unsalted butter softened
- 100 g caster sugar
- 1 egg beaten
- 1 teaspoon vanilla extract
- 225 g plain flour
- Pinch of salt
For the Icing:
- 100 g dark chocolate
- 25 g butter
Instructions
Preheat the Oven
- Preheat oven to 180°C (160°C fan) or 350°F. Line a baking tray with parchment paper. Proper heat ensures even baking.
Cream Butter and Sugar
- In a bowl, beat butter and sugar until light and fluffy. This makes biscuits soft yet crisp.
Add Egg and Vanilla
- Add beaten egg and vanilla extract. Mix gently until combined. Do not overmix, or biscuits may be tough.
Fold in Flour
- Sift flour and salt into the mixture. Fold gently until a smooth dough forms. Dough should be soft but not sticky.
Shape the Biscuits
- Roll dough on a floured surface to about 1 cm thick. Cut into finger shapes using a knife. Place on prepared tray.
Bake the Biscuits
- Bake for 15–20 minutes until golden at the edges. Remove from oven and cool on a wire rack. Cool completely before icing.
Prepare the Chocolate Icing
- Melt dark chocolate and butter together in a saucepan over low heat. Stir until smooth. Remove from heat to cool slightly.
Ice the Biscuits
- Spread melted chocolate over each biscuit with a spoon or small spatula. Let chocolate set completely. Place in a cool, dry place.
Serve and Enjoy
- Serve biscuits on a plate with tea or coffee. Store leftovers in an airtight container. Enjoy the crisp biscuit and rich chocolate together.
Notes
- Use milk chocolate for a sweeter topping.
- Add a sprinkle of chopped nuts or coconut before chocolate sets.
- Freeze uniced biscuits for up to 1 month. Ice after thawing.
- For extra flavor, add a teaspoon of orange zest to the dough.
- Make mini versions for party platters or gifts.
FAQs about Mary Berry Iced Fingers Recipe
1. Can I make the dough ahead of time?
Yes, you can make dough and chill for up to 24 hours. Roll and cut just before baking.
2. Can I use a different type of chocolate?
Absolutely, milk or white chocolate works. Adjust sweetness as needed.
3. Can I make them gluten-free?
Yes, substitute plain flour with gluten-free flour mix. Texture may slightly differ.
4. How long does it take for chocolate to set?
Chocolate usually sets in 30–60 minutes at room temperature. Refrigeration speeds up the process.
5. Can I decorate them further?
Yes, use sprinkles, nuts or drizzles of white chocolate for festive variation.
Final Thoughts
The Mary Berry Iced Fingers Recipe is a classic, elegant biscuit for any occasion. You now know how to make Mary Berry Iced Fingers step by step.
The Ingredients for Mary Berry Iced Fingers are simple and easy to find. This recipe produces crisp biscuits with rich chocolate topping every time.
Perfect for tea, parties or gifts, these treats are sure to impress family and friends. Baking them brings joy, fun and delicious results in every bite.

Zoey Lane is the voice behind ZoeyCooks.com, where she shares comforting, home-tested recipes inspired by everyday cooking. She believes great food should be simple, approachable and enjoyable to make.